Search This Blog

Showing posts with label Crafts. Show all posts

Wednesday, 23 October 2013

Easy Thanksgiving Centerpiece


Thanksgiving Pumpkin Flower Center Piece


Fall is such a beautiful time of year.  I just love all the leaves changing colour, they are so colourful and vibrant.  So, here is a great way to bring some of that colour into your home to enjoy.

This centerpiece is so easy and looks great, just follow along.

What You Will Need


  • pumpkin
  • potted plant
  • ribbon
  • bowl (approximate size of the flower pot)
  • sharpie
  • knife
  • spoon
Thanksgiving Pumpkin Flower Center Piece


Step One
Position the bowl on the top of the pumpkin.  Make sure it is centered and even, as this is where your potted plant will go in.  When you have it in a good position, trace around it with your sharpie.

Making Pumpkin Center Piece

Step Two
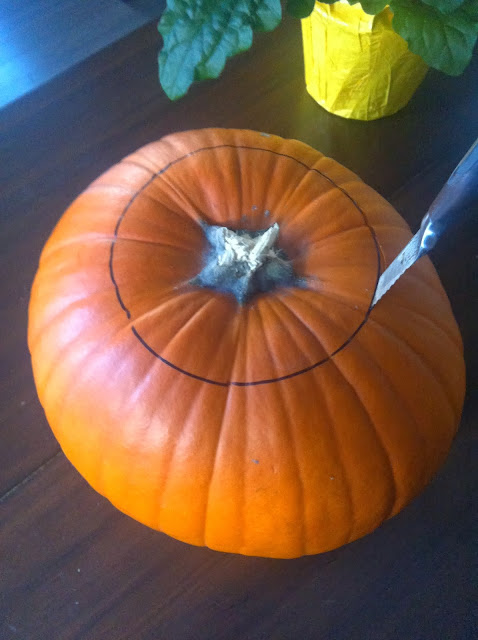
Cut along with line with a sharp knife, making a complete circle and remove the top.
Making Pumpkin Center Piece

Step Three
Scoop out all of the inside of the pumpkin, making sure you get all the seeds and stringy pumpkin guts (oh yes this is my official term) out.  Make a very nice a clean inside.  You might have to scrape the sides a bit in order to get a nice smooth inside.

Feel free to separate out the pumpkin seed and dry them out.  They make a wonderful snack and are very healthy for you.

Making Pumpkin Center Piece

Step Four
Now check to see if the plant fits, you might find you need to trim a little more.  Now depending on the size of your plant pot it will either sit on the bottom of the pumpkin or you will want the top of the pot to fit firmly in the opening.  Just make sure the plant itself is not squished and cramped looking.

Making Pumpkin Flower Center Piece


Pumpkin

Step Five
Once you have the right size hole in the top, here is a little trick for you to keep the pumpkin for getting moldy.

Swish around some bleach inside the pumpkin.  Make sure you cover the entire inside of the pumpkin, the spill out any left over bleach out.

Note:  you might want to air it out for a few hours before putting it all together and placing on table to get ride of the bleach smell.

Step Six
Fold over the wrapping of the plant so it is even with or slightly below the top of the pot.


 I like to keep the wrapping on as it holds in the water for the plant, making sure you do not have a puddle of water growing in the bottom of the pumpkin.

Them fit in the plant, tucking in the wrapping so it is not visible and finish with a ribbon bow.

Making Pumpkin Center Piece


Now that's Creative!

Monday, 15 April 2013

How To Remove Print From Plastic Containers

If you are like me, you have joined pinterest and have become quit addicted.  I have a ton of pins with great ideas to do, but have not done any and not sure if they even work.............so, I have given myself a challenge and I must start trying them out or no more pinning!!!

I thought I would try to see if you can really remove the print from a plastic container.  I have been making my own Coconut Ice Cream and instead of using the popsicle trays I thought I would re-use these nice little single serving containers.


All you need is an old cloth and acetone (nail polish remover).  Soak the cloth with the acetone and cover the plastic container.  Let sit for a few minutes and then start rubbing...............


And what do you know.......it works!!  


Now I can fill them with my own home make ice cream or anything else.  These will be very useful as they do not leak either.

Now that is Creative!

Thursday, 1 December 2011

Throw Pillows - white with blue ribbons

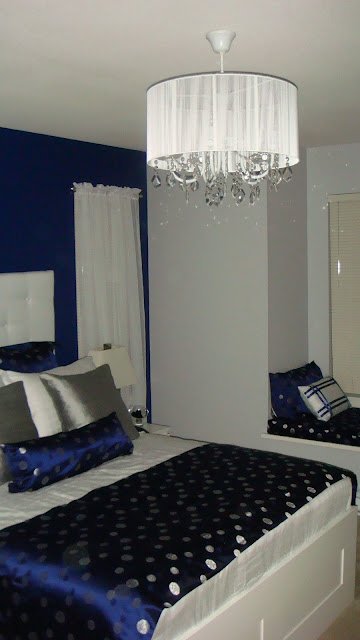
I am still working on the final touches of our bedroom makeover.  The window seat turned out fantastic, but I never got around to making the throw pillows for it. 


I have all the fabric and pillows just need to find the time to sew them.  With Christmas fast approaching I have put it into high gear and I am determined to complete the project this week.

This is the first set of pillows I will be making.  They are white with a navy blue ribbon detailing.


After cutting the fabric into 4 rectangles, I cut the ribbon into strips and marked the fabric as to where I wanted them to go. 


I then used fusing tape to attach the ribbons to the front of the pillow fabric.


I decided to put zippers in all the pillows I make, as it just gives it that final touch and a more professional look.  Plus if you ever need to wash them it really makes it a breeze.

Here is a little trick I learned (I am not much of a sewer, so this was new to me, however, you might already know this), put the zipper in first on what ever side seam you decided then finish all the other seams up.

The ribbons took a lot longer than I thought they would, but I think the extra effort and time was well worth it.  The pillow on it's own was just to plain. 


Look how great they look on my window seat.


Now that's Creative!